You can build a Freshcaller app by using the following steps.
- Install NVM
- Install Node
- Install the Freshworks CLI
- Create an App
- Test a front-end App
- Validate and Pack
Apps built on the Freshworks platform are compatible with the latest and immediately preceding version of the following browsers.
- Google Chrome
- Firefox
- Edge
- Safari
Install NVM
Node Version Manager (NVM) enables you to install and work with multiple versions of Node.js. You can use NVM to install Node.
- To install NVM:
-
On MacOS,
-
Follow the installation and upgrade steps mentioned in NVM’s GitHub repository.
Or -
Install via brew:
- Install brew.
- Run the following command to verify the brew installation. $ brew
- Run the following command to install NVM: $ brew install nvm
-
Follow the installation and upgrade steps mentioned in NVM’s GitHub repository.
-
On Linux,
- Run the following command to install the cURL utility. $ sudo apt install curl
-
Use the following cURL command to run the installation script.
$ curl -o- https://raw.githubusercontent.com/nvm-sh/nvm/master/install.sh | bash
Note: This command automatically adds the requisite nvm configuration to the .bashrc file that is used to load the configuration to a terminal session However, if the .bashrc file is modified, the file should be refreshed for the configuration to be applied to a terminal session. To refresh the .bashrc file and load any nvm configuration changes in the current terminal session, run the source ~/.bashrc command.
-
On Windows,
-
Download the NVM Setup installer and follow the installation steps to complete the setup.
Or -
Install via Chocolatey
- Open the Powershell in the admin mode and run the following command to install Chocolatey. $ Set-ExecutionPolicy Bypass -Scope Process -Force; [System.Net.ServicePointManager]::SecurityProtocol = [System.Net.ServicePointManager]::SecurityProtocol -bor 3072; iex ((New-Object System.Net.WebClient).DownloadString('https://community.chocolatey.org/install.ps1'))
- To verify the Chocolatey installation, run the following command. $ choco -v
- Run the following command to install NVM. $ choco install nvm
-
Download the NVM Setup installer and follow the installation steps to complete the setup.
- To verify the NVM installation, run the following command. $ nvm --version Ensure that the installed nvm version is 0.39.3 or later. If you are on an earlier version of NVM, upgrade to version 0.39.3 or later.
Install Node
To install Node.js, follow the given steps.
-
To install Node using NVM, run the following command.
$ nvm install 18
Note: With the latest FDK version, support for building apps on earlier versions of Node.js is unavailable.
-
To verify the Node installation, run the following command.
$ node --version
Ensure that the installed Node version is 18.15.0 or later. If you are on an earlier version of Node, upgrade to version 18.15.0 or later.
Note: On Windows, if the node version is not displayed, you should run the nvm on command to enable nvm.
- Run the following command to set the default Node version. $ nvm alias default 18
-
Install the build tools that are required to start using Node:
-
On MacOS,
- Run the following command to install the XCode CLI tool. $ xcode-select --install
- Run the following command to verify the installation: $ xcode-select -p
- On Windows: $ npm install --global --production windows-build-tools For more information, see the write-up on node-gyp.
-
On MacOS,
Install the Freshworks CLI
- Ensure to use npm for CLI installation. Also, ensure to use the npm version that is shipped with Node. For information on supported Node versions, see FDK and compatible Node.js versions. Use of any other npm version or use of alternative package managers such as YARN can affect the CLI installation and dependencies management.
- Uninstall the previous CLI version by using the npm uninstall fdk -g command and remove the existing FDK folder by using the rm -r ~/.fdk command.
- The Developer portal and SDK Terms of Use apply to the use of the CLI.
- To install the latest CLI version, run the following command. Copied Copy
- To install the CLI version that immediately precedes FDK 9.0.0, run the following command. Copied Copy
- Run the following command to verify the CLI installation. $ fdk version Ensure that the installed CLI version is 9.0.0 or later. If you are on an earlier version, migrate to 9.0.0.
1 | npm install https://cdn.freshdev.io/fdk/latest.tgz -g |
1 | npm install https://dl.freshdev.io/cli/fdk.tgz -g |
Note:This FDK/CLI version is compatible only with Node.js 14; it involves the use of platform version 2.2 for building apps. Support for Node.js 14.xx and platform version 2.2 will be deprecated by July 31, 2023. Ensure to migrate to FDK 9.0.0 before the deprecation. For any migration related information, see Migration overview.
Create an App
You can use the following steps to create an app that displays the Freshcaller logo and logged in agent’s email address, in the incoming call notification and conversation window (after a call is established).
- From the command line, navigate to the empty directory in which you want to create an app.
- Run the following command. $ fdk create A prompt to choose a product is displayed.
- Select Freshcaller and press Enter. A new app is created based on the your_first_app template.

The following directories and files are created as a result of the fdk create command.
| DIRECTORY/FILE | DESCRIPTION |
|---|---|
| app/ | Contains all the files required for the front-end component of an app. The JS file follows the ES5 standard. |
| app/icon.svg | Contains the product icon. If you intend to extend the app, you can replace the icon.svg file. The icon file should be of SVG type with a resolution of 64 x 64 pixels. |
| app/template.html | Contains the HTML code required for the app’s UI, which is rendered in an IFrame. |
| config/ | Contains the installation parameters and OAuth configuration files. |
| config/iparams.json | Contains all the installation parameters whose values are set when the app is installed. For more information, see Installation Parameters. |
| manifest.json | Contains details such as the platform version the app uses, product to which the app belongs, event listeners for serverless apps, SMI functions that can be invoked from the app’s front end component, and npm packages (dependencies) that the app uses. |
| README.md | Contains additional instructions, information, and specifications. |
Note:
1. The iparam_test_data.json file has been deprecated. Before testing the app, navigate to http://localhost:10001/custom_configs and enter appropriate values for the configured installation parameters.
2. If you use React, Ember, Vue, or any other front-end framework, include the source files of your app in the src directory, to ensure quick app reviews.
Test a front-end app
- To test your app, use the latest version of Chrome.
- Ensure to sign up for a Freshcaller account.
- From the command line, navigate to the directory that contains the app related files and run the following command. $ fdk run
- Log in to your Freshcaller account.
- To the Freshcaller account URL, append ?dev=true.
Example URL: https://domain.freshcaller.com/dashboard?dev=true. - To allow the Chrome browser to connect to the test server that runs on HTTP,
- Navigate to Settings -> Advanced -> Privacy and security -> Site settings -> Insecure content.
- In the Allow section, click Add and enter the Freshcaller account URL.
Example URL: https://domain.freshcaller.com
-
From the homepage of your account, navigate to the appropriate location where your app is to be deployed, verify that the app is rendered and test your app’s function.
Or
Simulate an incoming call. If the app is successfully created, the Freshcaller icon is displayed on the incoming call notification, as shown in the image.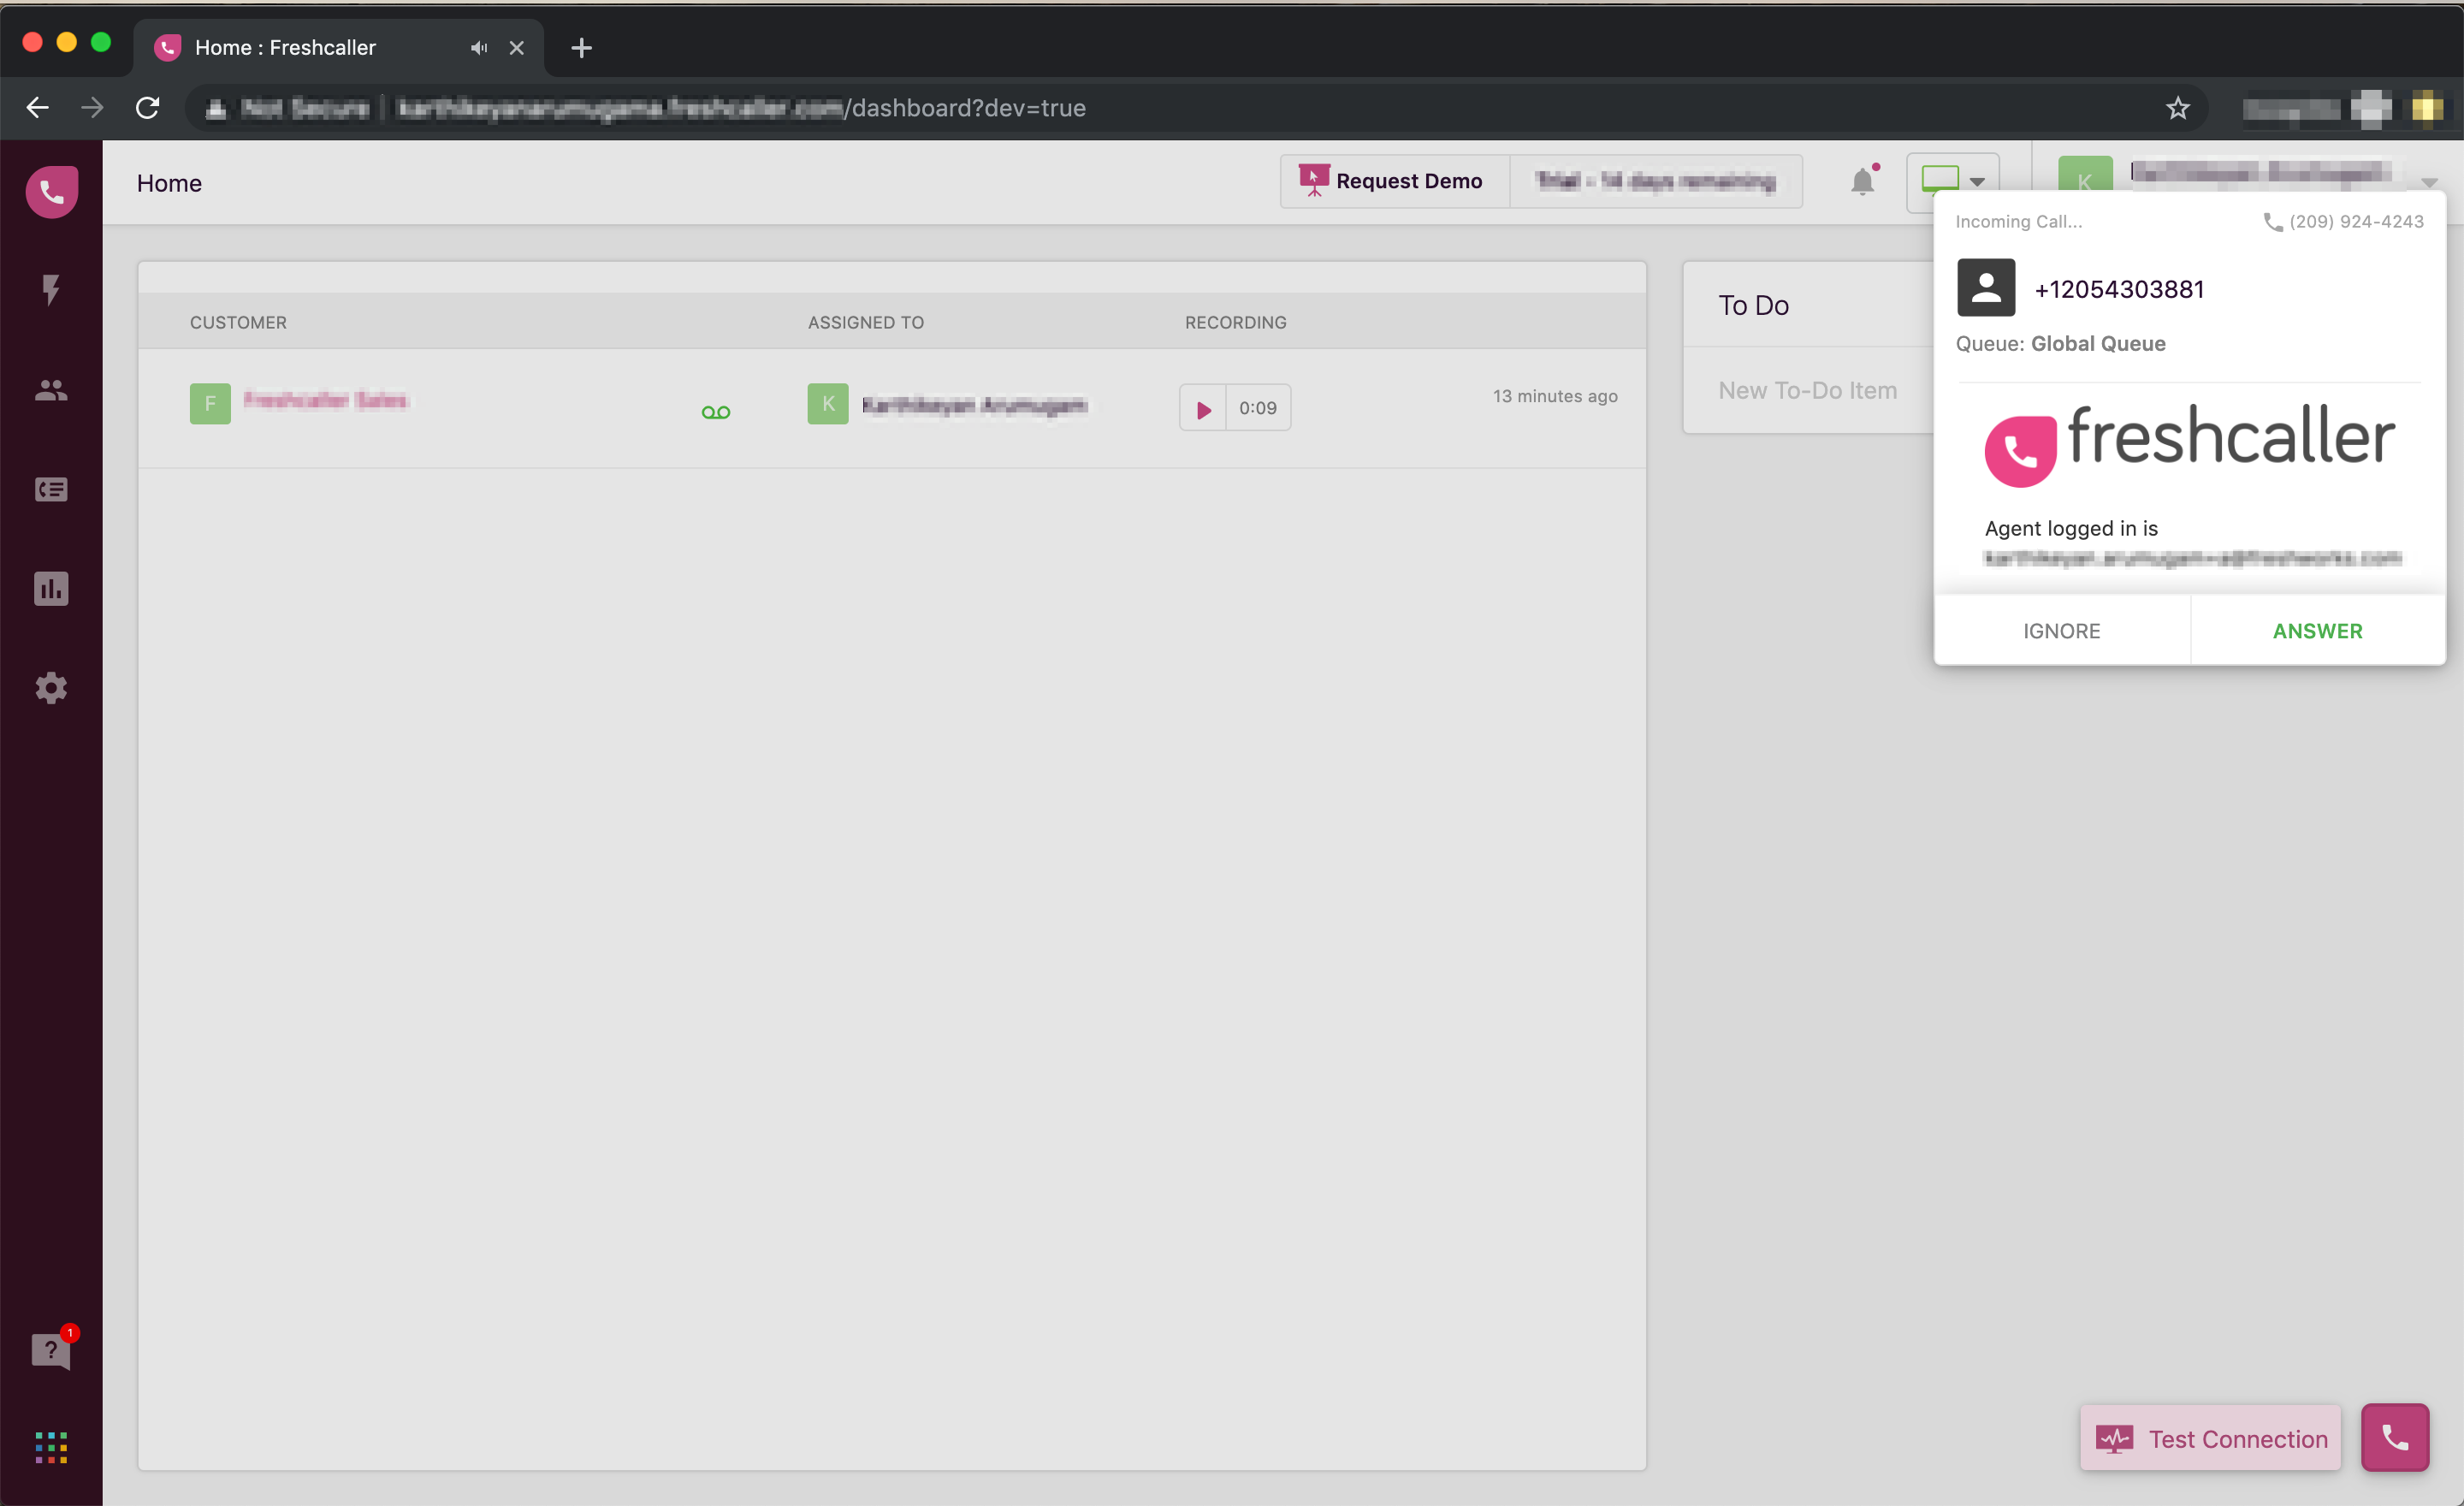
Note:
1. The extent of app testing is captured through the code coverage summary. For apps to be successfully published in the Freshworks Marketplace, each component in the coverage summary should be at least 80%. For more information, see Code coverage.
2. When testing your app, if you run into any issue, for a quick resolution from the support team, attach detailed logs of the output in your support ticket.
Validate and Pack
To check if the app is error-free and package it for submission, follow the given steps.
-
To validate the code, run the following command.
$ fdk validate [--app-dir DIR]
Here, DIR is the relative or absolute path to the app directory. If there are errors in the code, corresponding violations are displayed. To auto-fix certain errors and display only those that need manual fixing, use the $fdk validate --fix command. Ensure to fix all violations before packing the app.
-
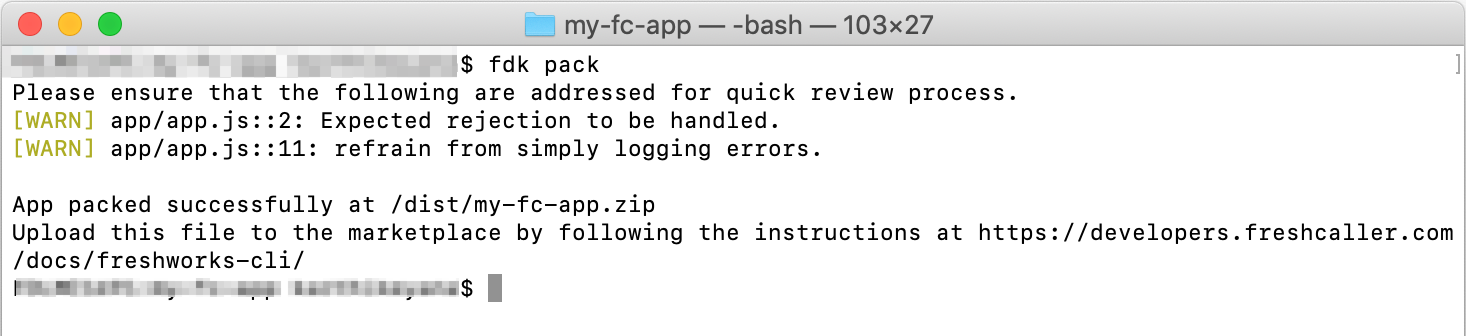
To pack the app for submission, run the following command.
$ fdk pack [--app-dir DIR]
The command generates the dist/<app_directory>.zip file.
- To publish the app to the Freshworks Marketplace, navigate to the Freshcaller developer portal and upload the packed file. For more information on the app submission process, see Types of Apps.