The developer platform’s Test App Versions feature enables you to test multiple versions of an app in a production environment. After testing, you can choose to publish the most appropriate app version to app users. Apps users can view the published version in the Apps gallery (Admin Settings > Apps).
At any point in time, a maximum of three published versions of an app can exist in the Apps gallery. One test version can exist as an in-development app (displayed at Manage Apps > In Development). After thorough testing, an in-development app (that is, the test version) can be promoted to live. After a test version is promoted to live, the latest three versions are available as published versions.
When a test version is promoted to live, if the oldest published version is still in use, app users can continue using it; but it would not be displayed on the Manage Apps > Custom apps page. On this page, only the latest three versions are displayed.
The Test App Versions feature is available as part of the app submission process and the process enables you to,
Upload, test, and publish a new custom app
To submit a Custom app:
-
Log in to your Freshcaller account and from the left navigation pane, navigate to Admin Settings > Apps. The Apps gallery is displayed.
-
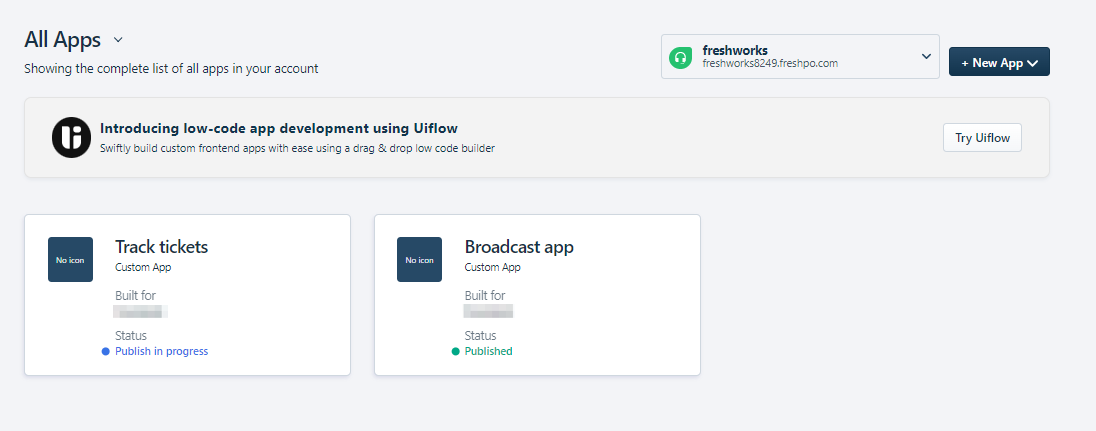
Click Go to Developer Portal. The All Apps page is displayed.
-
Click New App and select Custom App. The Create a new app page is displayed.
-
In the What do we call your app? field, enter a meaningful name comprising two or three words.
-
From What type of app is this?, select Custom App.
-
In the Custom App section, click Upload App file, select the packed app file, and click Open. The packed app file is uploaded.
-
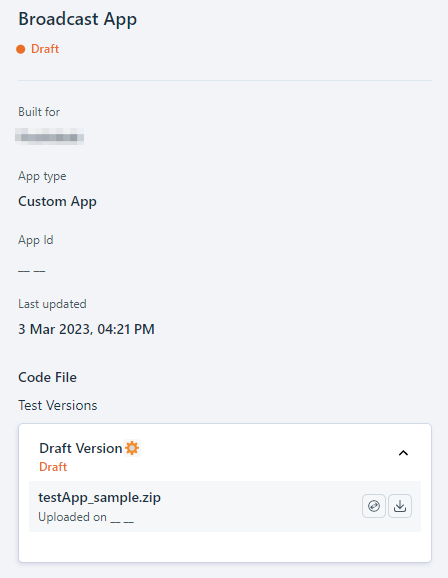
Click Proceed. A page for entering the app details is displayed. In the details panel on the left, the following values are auto-populated:
- The app’s name with the app status as Draft.
- Built for: The product for which the app is built.
- App type: Specifies how an app is available to an app user. Possible App types: Freshworks app (publicly displayed in the Marketplace), Custom app (private only to the customer using the product), External app (listed in an external website).
- App Id: An app’s identifier that is displayed after the app is published.
- Last updated: The timestamp of when the app was last modified.
- Code File: The status and versions of the uploaded app, displayed in chronological order. When a new custom app file is uploaded, it is listed under Test Versions and the status is Draft version (Draft).
-
In the main section of the app details page, navigate to the App information tab and fill out the requisite app details.
-
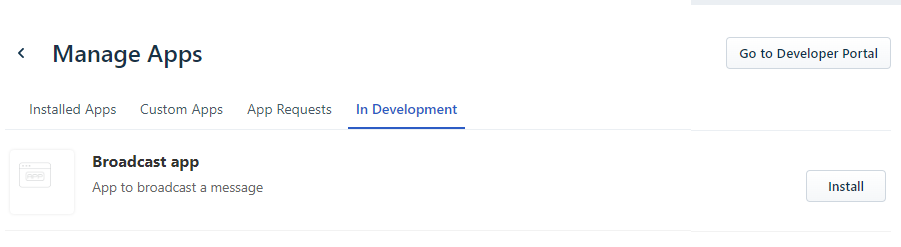
Click Save and test, to test the app before publishing. The Manage Apps page > In Development tab is displayed. Under this tab, a list of all the apps that are in development is displayed.
-
To test the uploaded app, click Install next to the corresponding app name.
- If the app requires third-party authentication, a corresponding window requesting for login credentials is displayed. Enter appropriate credentials and log in. The Authorize app window is displayed. Click Authorize.
- If the app requires input in the form of installation parameters, the Settings page is displayed with the list of installation parameters. Enter appropriate input values and click Install.

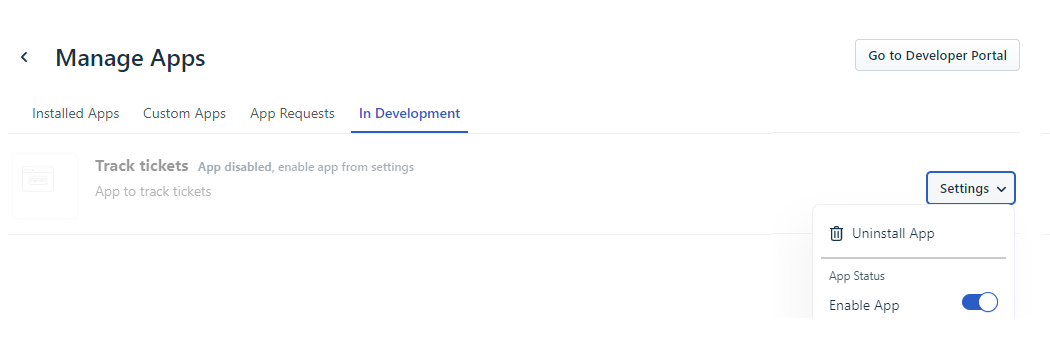
- To test uninstallation, click Settings > Uninstall App. The app is uninstalled and the Settings button is replaced with the Install button.
- To test app disabling, navigate to Settings > Enable app toggle key and set it to off state. The app is disabled.
Test the working of your front-end app.
Or
Test the working of your serverless app.- After testing, to submit the app for publishing, navigate to Admin > Support Operations > Apps > Go to Developer Portal. The All Apps page is displayed. All custom apps in development state are listed as cards.
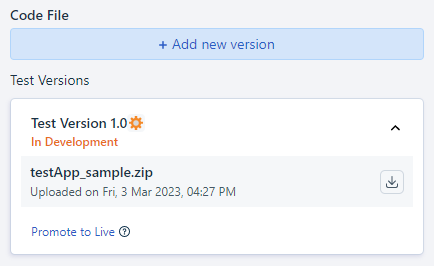
- Click on the appropriate Custom app card. The app details page is displayed. In the details panel on the left, in the Code File section, under Test Versions, the app version is specified as Test Version 1.0 (In Development).
- To view all app testing and app submission activities that have been performed, in the details panel, click View activities. The Activities page is displayed.
- To add a new version of the app that is in development, click Add new version. For more information, see Upload a new version of an in-development Custom app.
- Publish the app.
Note: To replace the uploaded app file, click Replace App file, select the packed app file, and click Open. The packed app file is replaced.
Note: The Manage Apps page is displayed in a new tab. In the current tab, in the Code File section, the app version changes from Draft to Test Version 1.0 (In Development)
Upload, test, and publish a new version of an in-development app
-
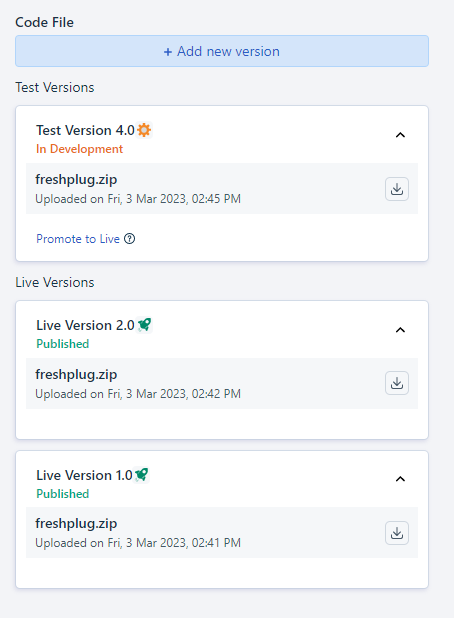
If you are not on the app details page, navigate to Admin Settings > Apps > Go to Developer Portal and click on the Custom app card corresponding to the in-development app for which you want to upload a new version. A page with the app details is displayed. In the details panel on the left, under the Code File > Live versions section, all published app versions (up to a maximum of three latest versions) are listed. Under the Code File > Test Versions section, the last uploaded in-development app version is listed.
Note: Only one app version can exist in the Test version (In-Development) status. If you upload a new version of an in-development app and save it, the latest version replaces the previous version.
-
In the app details page, under the Code File section, click Add new version. The Add new version window is displayed.
-
Click Click to upload, to select the packed app file and click Open. The packed app file is uploaded.
-
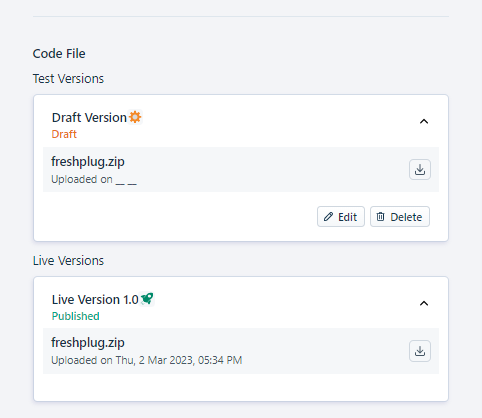
Click Save. The app details page is displayed. In the Code File section, the new version of the app is listed under the Test Versions section and the app status is Draft Version (Draft).

-
In the main section of the App information page, navigate to the App information tab and update the requisite app details.
-
Click Save and test, to test the app. The Manage Apps page > In Development tab is displayed. A list of all apps that are in development is displayed.
-
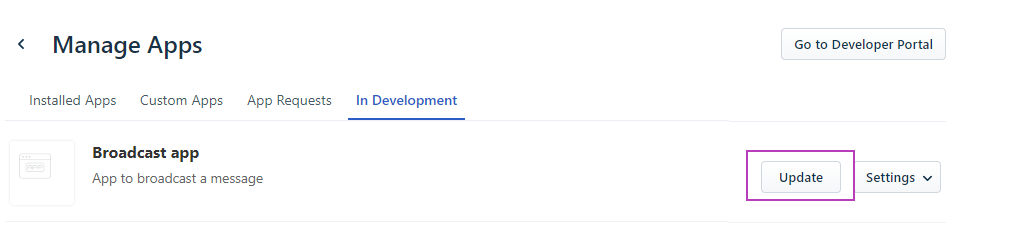
For an in-development app that has a new version uploaded, if the existing app version is installed and enabled, an Update button is displayed next to the app. Click Update to test the new app version.

-
For an in-development app that has a new version uploaded, if the existing app version is disabled, navigate to the Settings > Enable App toggle button and set it to on state. An Update button is displayed. Click Update to test the new app version.
-
If the in-development app is not installed, click Install. The app is installed and the Install button is replaced with the Settings button. The previous version of the in-development app is updated to the latest version.
-
To test uninstallation, click Settings > Uninstall App. The app is uninstalled and the Setting button is replaced with the Install button.
-
To test app disabling, navigate to Settings > Enable app toggle key and set it to off state. The app is disabled.
-
Test the working of your front-end app.
Or
Test the working of your serverless app. -
After testing, to submit the app for publishing, navigate to Admin > Support Operations > Apps > Go to Developer Portal. The All Apps page is displayed. All custom apps in development state are listed as cards.
-
Click on the appropriate Custom app card. The app details page is displayed. In the details panel on the left, in the Code File section, under Test Versions, the app version is specified as Test Version n+1.0 (In Development), where n is the previous app version that was tested.
 For information on how to publish the new uploaded version, see Publish the app.
Upload, test, and publish a new version of an existing Freshworks app
-
Navigate to Admin Settings > Apps > Go to Developer Portal and click on the Custom app card corresponding to the published app for which you want to upload a new version. A page with the app details is displayed. In the details panel on the left, under the Code File > Live versions section, all published app versions (up to a maximum of three latest versions) are listed.
-
In the Code File section, click Add new version. The Add new version window is displayed.
-
Click Click to upload and select the packed app file and click Open. The packed app file is uploaded.
-
Click Save. The app details page is displayed. In the Code File > Test Versions section, the new version of the app is listed. The app status is Draft Version (Draft).
- To replace the uploaded app file, click Edit. The Add new version window is displayed. Click Replace to upload a new packed app file.
- To delete the uploaded app file, click Delete.
-
In the main section of the app details page, navigate to the App information tab and update the requisite app details.
-
Click Save and test, to test the app before publishing. The Manage Apps page > In Development tab is displayed. A list of all apps that are in development is displayed. The previously published version of the app is disabled.
-
Navigate to the Settings > Enable app toggle key and set it to on state, to enable the app. The Update button is displayed.
To test the enabled app, click Update. If required, reauthorize the app and provide appropriate values for the installation parameters. The previous version of the published app is updated to the latest version of the app to be tested.
To test uninstallation, click Settings > Uninstall App. The app is uninstalled and the Setting button is replaced with the Install button.
To test app disabling, navigate to Settings > Enable app toggle key and set it to off state. The app is disabled.
Test the working of your front-end app.
Or
Test the working of your serverless app.After testing, to submit the app for publishing, navigate to Admin > Support Operations > Apps > Go to Developer Portal. The All Apps page is displayed. All custom apps are listed as cards.
Click on the appropriate Custom app card. The app details page is displayed. In the details panel on the left, in the Code File section, under Test Versions, the app version is specified as Test Version n+1.0 (In Development), where n is the previous version that was tested.
Publish an app
To publish an app after testing:
-
In the app page > Code File section, navigate to the Test Versions section and click Promote to Live.
Or
In the main section of the app details page, click Save and Publish.
-
In the app details panel on the left, the status of the app changes to Publishing In Progress. Custom apps are not subject to the review process and are available for installation within 30 minutes of app submission. After the app is successfully added as a Custom app, the status of the app changes to Published. In the app details page > details panel on the left,
- The app status is Published.
- The Last updated field value is updated.
- The Last published field is displayed and the value of this field is auto-populated.
- The App Id field value is displayed.
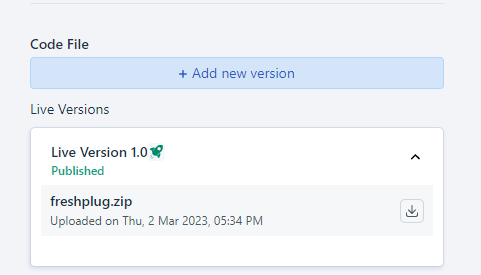
- Under the Code File section, the app details are moved to the Live Versions section and the app status is Published.
- The published custom apps are displayed under the Manage Apps > Custom Apps tab. A custom app can have only three published versions. If a new app version is promoted to live, only the three latest versions are displayed under the Manage Apps > Custom Apps tab. If no app users are using an outdated version, that version is deleted from the system. If app users are using a version older than the latest three versions, the app users can continue using the older version but it would not be displayed at Manage Apps > Custom Apps.
- After the app is published, in the Manage Apps page > In Development tab the app version that is published is disabled.
App information tab
-
Click Upload App icon and upload an icon to represent the app. Ensure that the logo meets the following requirements.
- Image format is PNG.
- Logo background is transparent.
- Aspect ratio is 1:1.
- Minimum resolution is 400 x 400 pixels.
-
Provide appropriate app information by using the following fields.
- Image format is PNG or JPG.
- Minimum resolution is 1600 x 1000 pixels.
| Field | Description |
|---|---|
| App Name Mandatory |
Enter a name for the app, comprising two to three words. |
| App Overview Mandatory |
Enter an introduction to the app, not exceeding 100 characters. |
| Short Description | Enter a brief description of the app’s functionality and features. |
| App Description Mandatory |
Enter a description stating the value that the app imparts to Freshcaller. Mention any specific use case necessary to support the value proposition. |
| Instructions | When the app is installed, if specific user actions are required, enter the instructions as a sequential list. |
| App Screenshots | Upload screenshots to illustrate how the app works. Capture different states and process flows to give users a better insight into the app. You can upload a maximum of five screenshots.
Ensure that the screenshots meet the following requirements.
|
| Support Email Mandatory |
Enter the email address that users can use to contact you in case of any queries regarding the app. |
| Support URL | Enter the URL to any location where users can find more information about the app. |
| Alternate Email | Enter the email address that Freshworks can use to contact you, when the app is under review. |
Install a custom app
-
Log in to your Freshcaller account and from the left navigation pane, navigate to Admin Settings > Apps. The Apps gallery is displayed.
-
Navigate to Manage Apps > Custom Apps. A list of all custom apps that are successfully published is displayed.
-
Click Install next to the app that is to be installed.
- If the app requires third-party authentication, a corresponding window requesting for login credentials is displayed. Enter appropriate credentials and log in. The Authorize app window is displayed. Click Authorize.
- If the app requires input in the form of installation parameters, the Settings page is displayed with the list of installation parameters. Enter appropriate input values and click Install.